


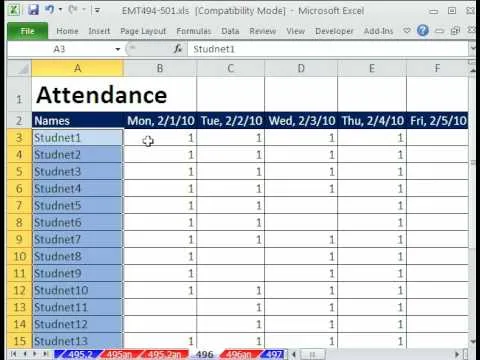
If you're a teacher in any type of school, whether it's high school, college, or middle school, it's imperative that you keep an attendance sheet. The paper and pen route can get pretty messy, and very disorganized, and that's where Microsoft Excel comes in. With this software, you can create a simple yet functional attendance sheet to keep track of your students.
Using the method outlined below, you can automate the entry of many fields, as well as total up attendance days using SUM and IF functions. You'll also be able to create a print area where attendance totals are associated with their students.
This guide uses the latest Windows version of Excel, but these steps will work on all legacy versions of Excel for Windows and Mac OS X (now macOS), as well as Excel online. If you're using Excel on a Mac computer, just note that the CTRL key for Windows will be the CMD key for Mac.
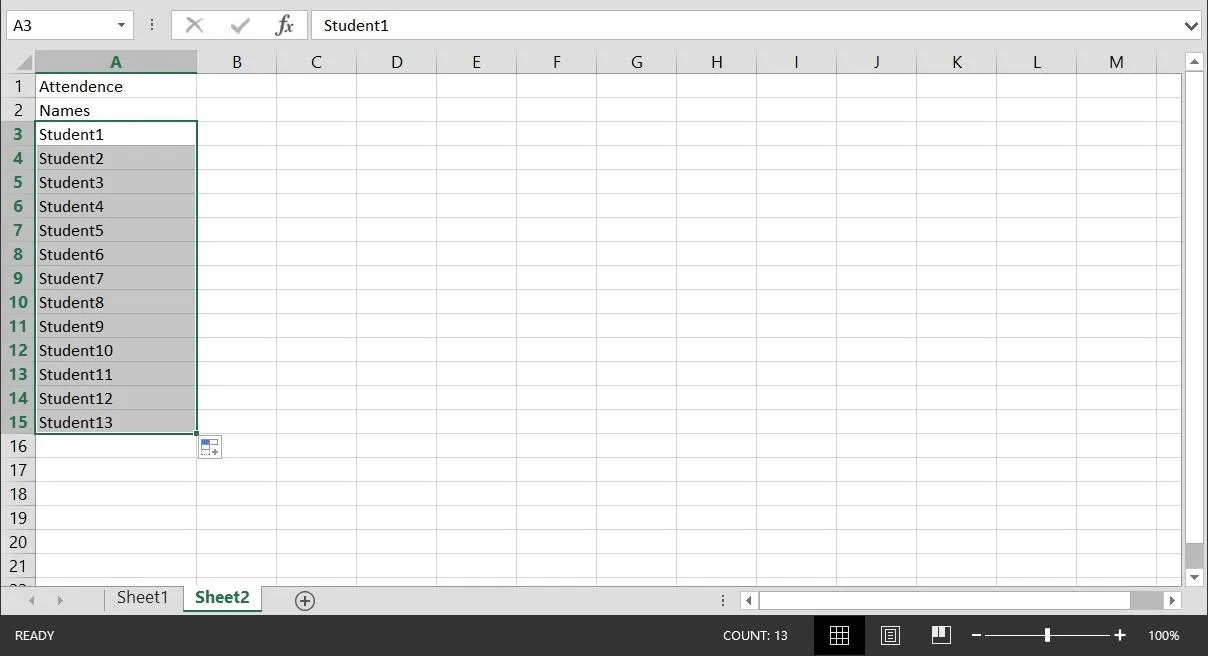
Fill in Basic Labels
Fire up Excel, and start by adding labels for Attendance and Name, then use "Student1" for the name name slot. With the "Student1" box selected, hit CTRL + Enter, then drag down from the bottom-right corner of the box to fill in more student slots.
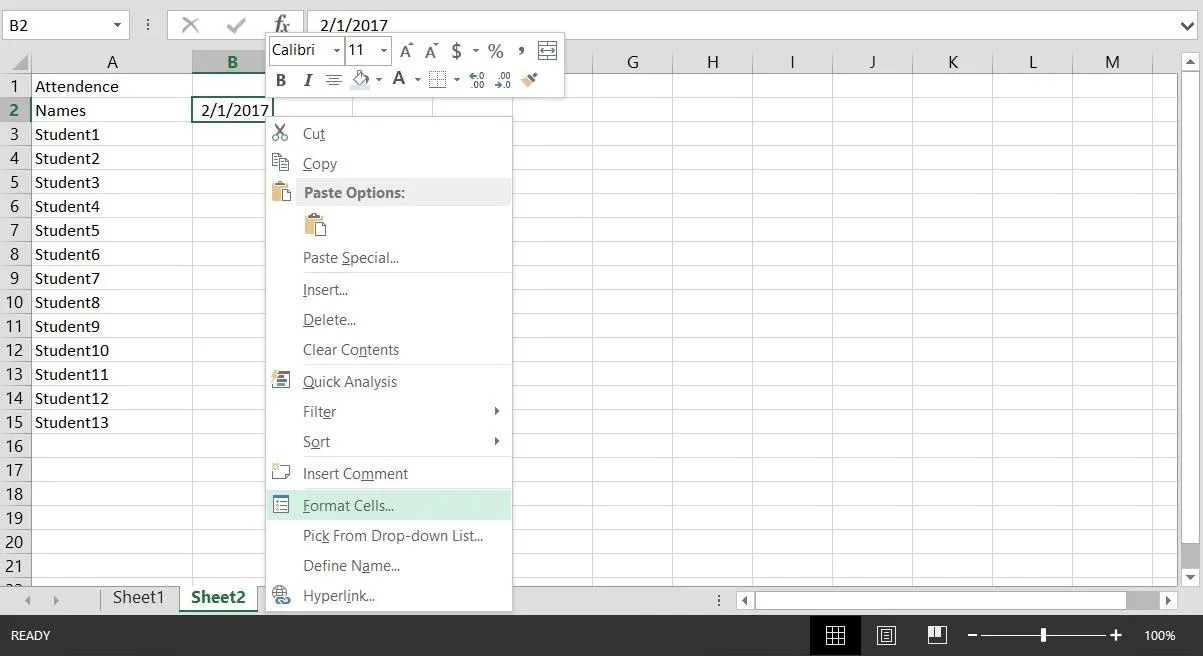
Add & Format Dates
Now it's time to add dates, format them, and remove weekends. Start by entering a date in the following format: 2/1/2017. Once you've done so, right-click and select "Format Cells."
From here, choose the Number tab, then select "Custom." We're going to add the day of the week to the date format so that we end up with "Wed 2/1/17." To achieve this, input ddd m/d/y in the Type field.
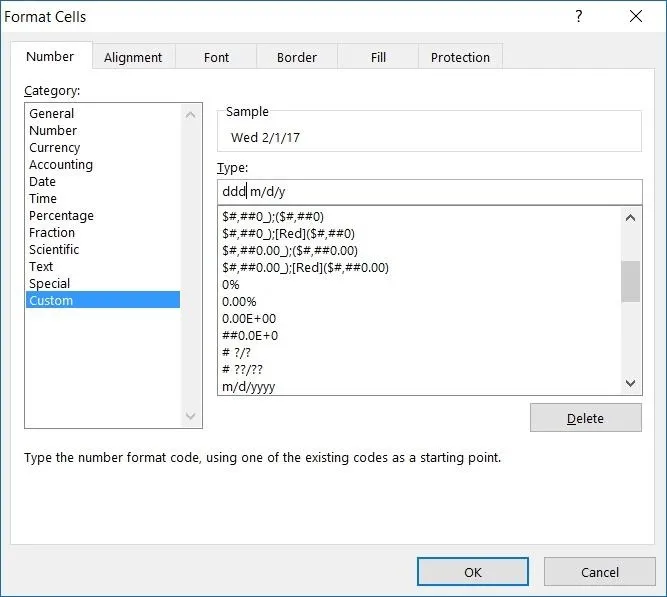
Feel free to mess around with the formatting. For example, "mmm" will abbreviate the month, "mmmm" will spell out the month, "dddd" will spell out the day, etc.
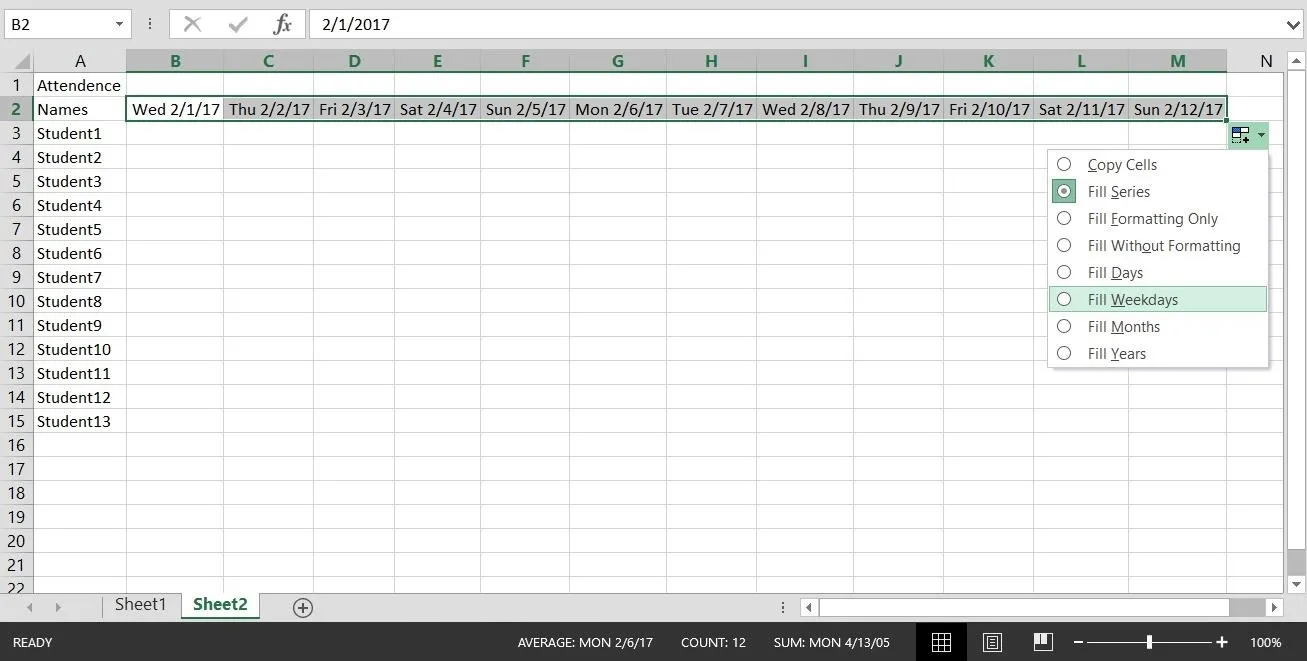
Now with the date entered and formatted, simply drag across to fill in for the rest of the month (or until you'd like to stop recording).

And to remove Saturday and Sunday, Excel has a nifty tool for that. Simply click on the tiny box that populates at the end of your date range and select "Fill Weekdays."
Add Column for 'Total'
While the very right of the worksheet would seem like the best place to have the total attendance tally, I think it makes much more sense to place it next to the student's name. So, highlight column B, then right-click and choose "Insert" to add a column. Label this column as "Total," then let's add some lines and color to better distinguish what we're working with.
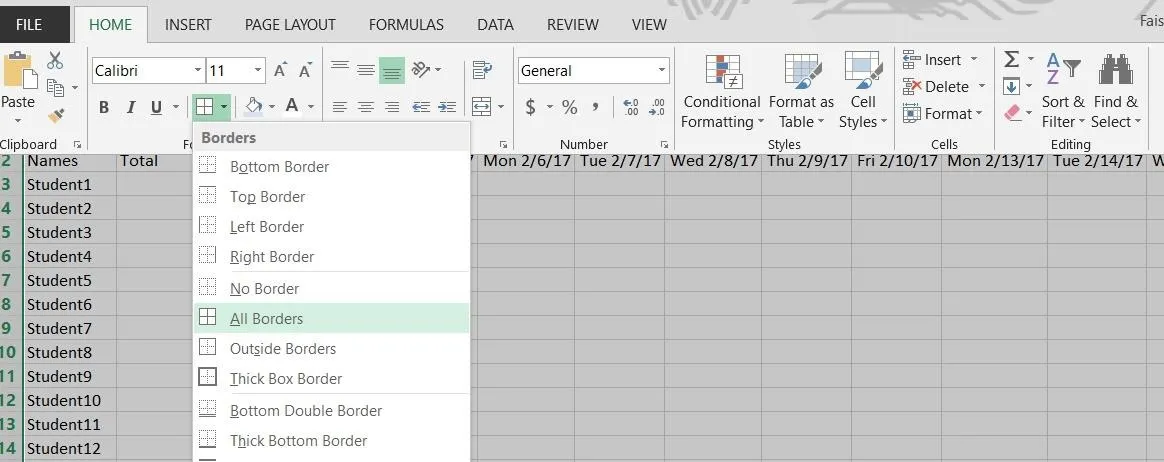
Select the entire area of your sheet, but be sure to leave a few empty slots for additional students. Once selected, go to Grid (under the Home tab) and select "All Borders."
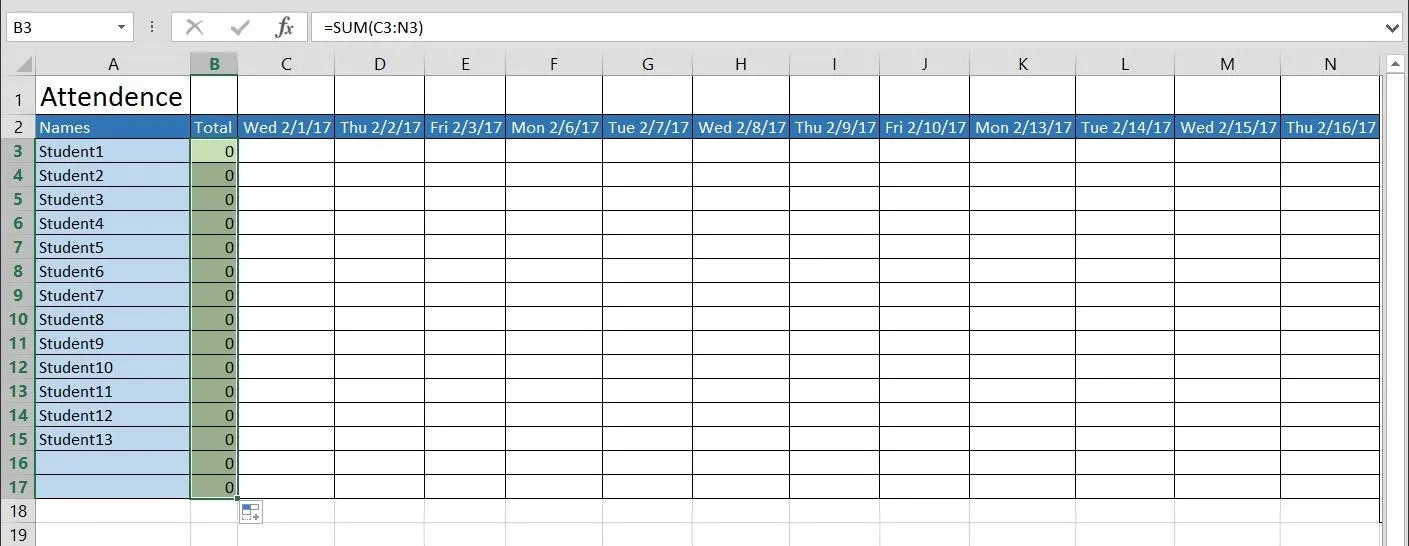
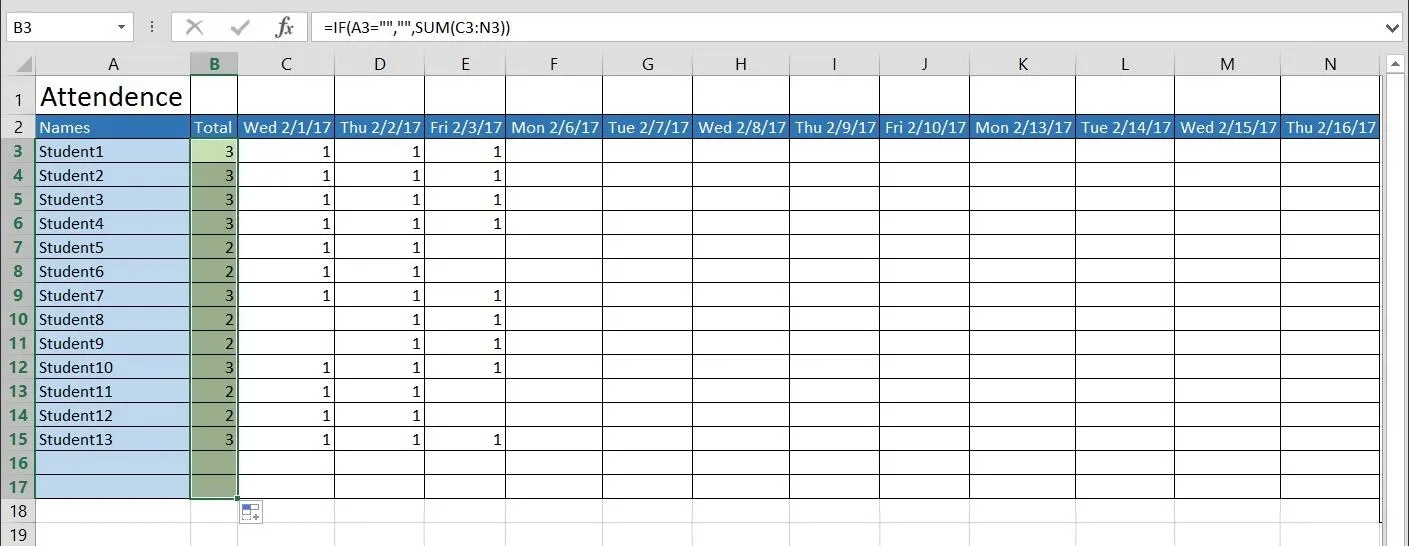
Now is a good time to add color. I'll distinguish between the "Names" and "Total" columns, as well as the dates row. Then you're ready to add a formula to total up attendance. In the first slot for Total, enter =SUM( and click on the first date box. After that, use Shift + Right Arrow to scroll to the end of the row, then press Enter. You can also use you mouse to click and drag. Once you've done that, you'll notice that the total for Student1 is at 0. Now drag that box down from the bottom-right corner to the last entry (including any blank slots you've allotted).
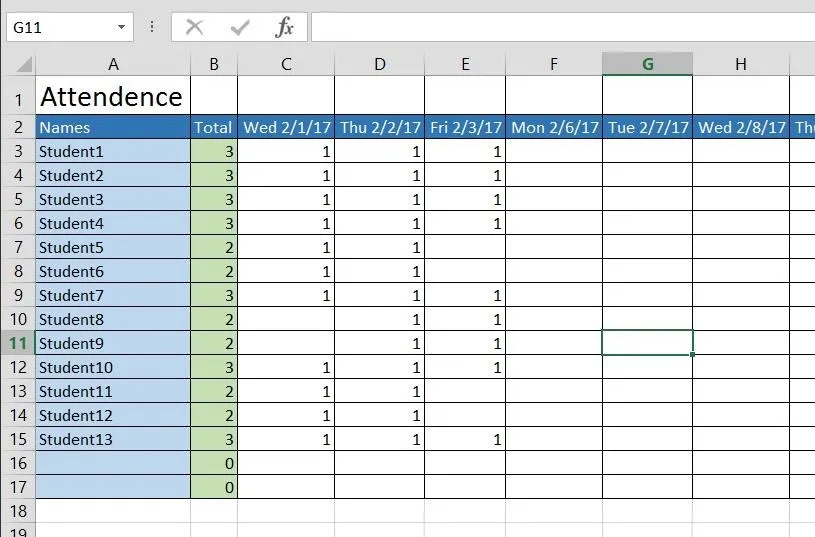
Test out the tally by entering in 1 for students (to indicate attendance) or leaving boxes blank (to indicate absence).
Remove Zeros for Non-Existent Students
To remove the reporting of a zero value for slots not assigned to students, we'll add an IF statement to the SUM function. Click the first total box where we entered the formula previously, then enter "IF(" and click on the box for the Student1. Now continue with the formula IF(A3="" which means if the box with "Student1" is empty (""), something will happen. That something is for the accompanying Total value to show as blank, rather than zero.
So we'll continue with IF(A3="", "", and finish it out with the existing SUM function. In the end, that formula should look like:
Once you have that in place, drag down to fill in the rest of the slots. You'll notice the slots with no student names from from "0" to blank.
Create Printable Area for Final Tally
When you're ready to print out a simple tally for each student, simply select both columns, then go to the Page Layout tab and select "Print Area," then "Set Print Area."

Be sure to deselect the Print Area when you're done.
Check Out the Video Guide
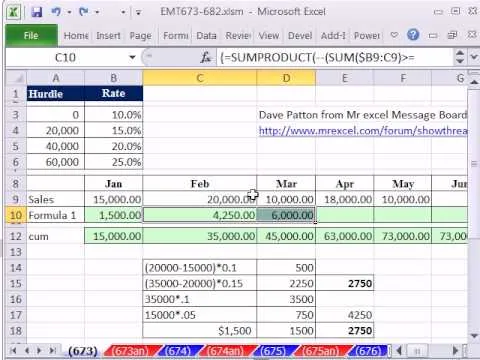
If you find it easier to follow along with a video example, ExcelIsFun has a great instructional guide below, and you'll even get a few more tips. It also will show you how to put the attendance totals of the right of the sheet, if you'd prefer that instead.
Cover image and screenshots by WonderHowTo


Comments
Be the first, drop a comment!