

Everything Else


How To: Sort table contents in MS Word 2007
This is another HelpVids.com technology video. This video will teach us how to sort table contents in Microsoft Word 2007. The video starts out with a Word 2007 document with a sample table. When you click on the table, you will see the Table Tools tab appear above the ribbon. Click the Table Tools button, then click Layout and finally the Sort Button. The sort dialog box allows you to choose which column to sort by, which direction you would like to sort, and any secondary sorting you would ...
How To: Insert special characters in MS Word 2007
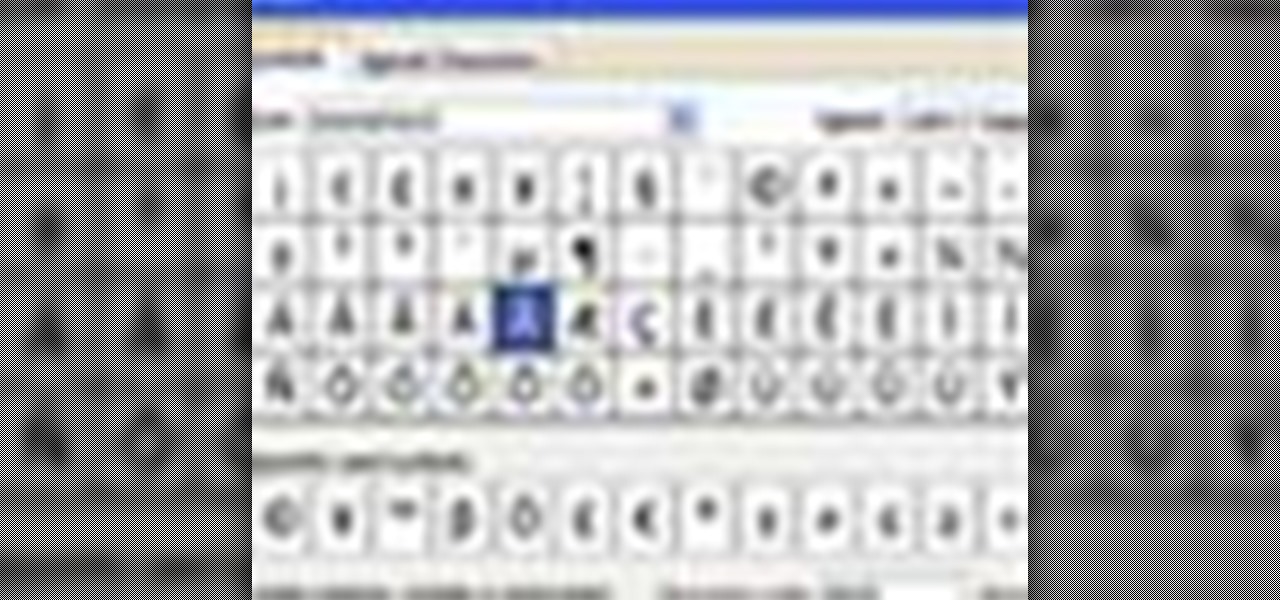
A video from Helpvids.com that shows how to insert special characters in MS Word 2007. A seldom used function in MS Word is the Insert Symbol function. Symbols like the copyright, infinity, registered trademark, Yen, Pound, Euro etc can be of use in some documents. Word provides an easy way to insert these and many other such symbols into your documents without much hassle (For example, using the Character Map utility provided with Windows).

How To: Create bulleted or numbered lists in MS Word 2007
This video explains how to add a bulleted or numbered list in Microsoft Word 2007. The shortcut to create a bullet-list is simple holding Shift and pressing the "A" key. After you hit the space bar or type a character the bullet will appear, and when you hit the Enter key it will continue the bulleted list. For numbering you just need to type the number you want and a dot after it and it should begin a numbered list. The list will continue if you press enter just like a bullet-list will. If y...
How To: Format tables in MS Word 2007
In this video the instructor shows how to format tables in Microsoft Word 2007. To know how to format tables in Word, you will first have to know how to create them. This video assumes that you already know how to create tables. When you click inside a table in Word, a new tab label, Table Tools, appears above the Design tab in the tool bar. In the Design tab there are a lot of options available that can change the look of your table with just a click. To the extreme left there are three chec...
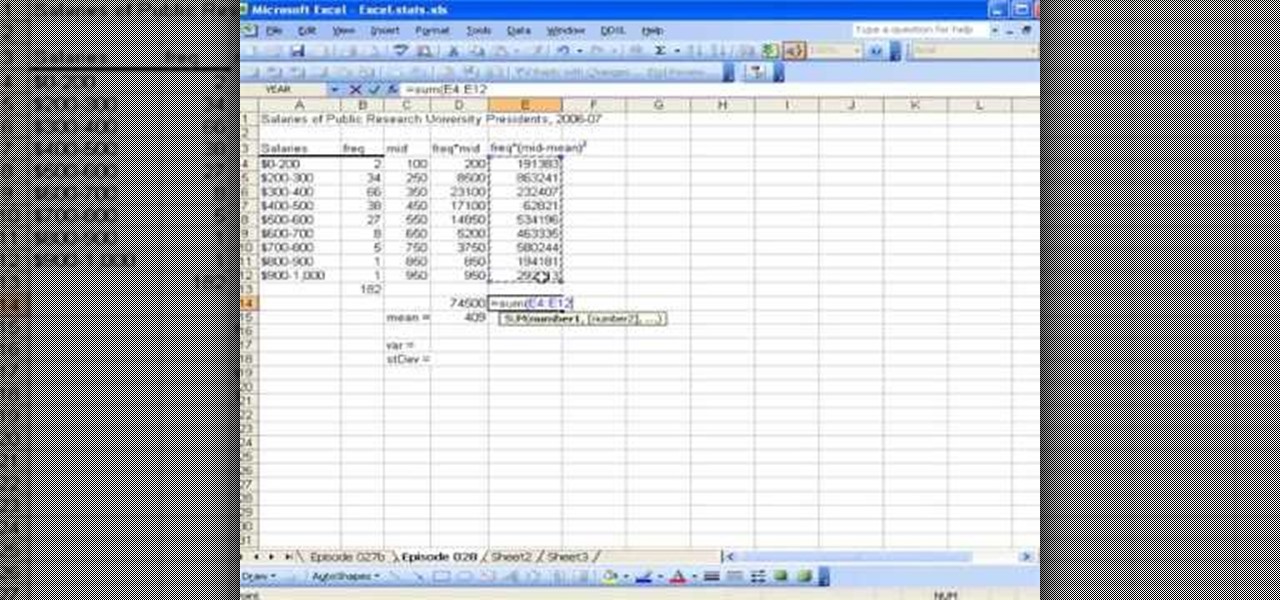
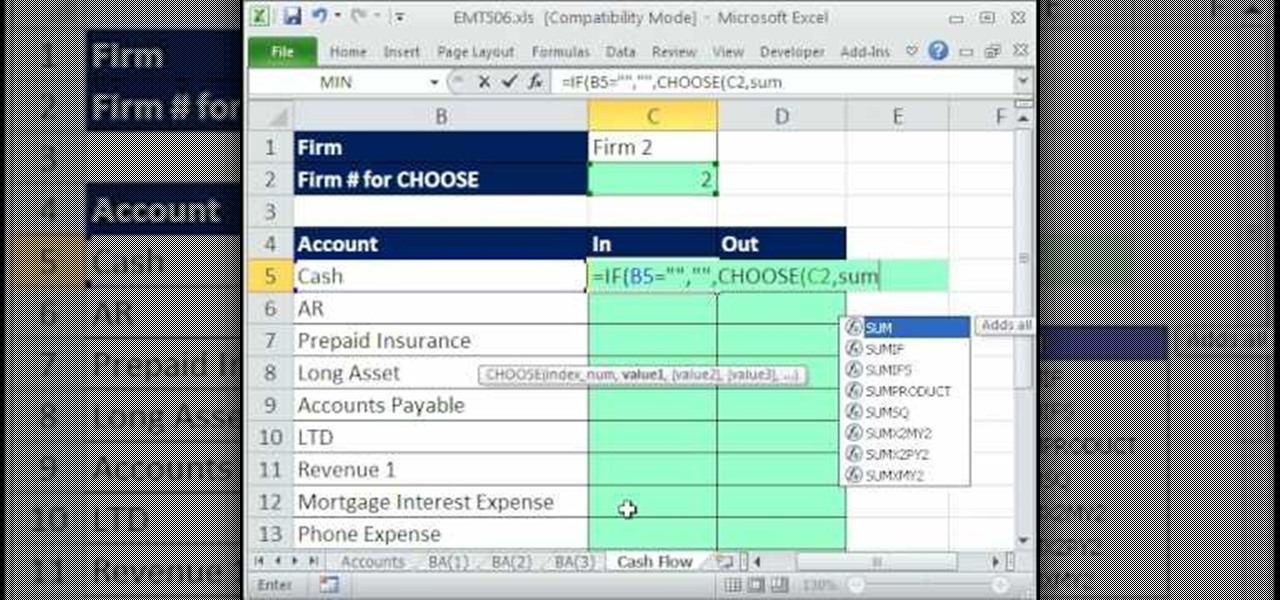
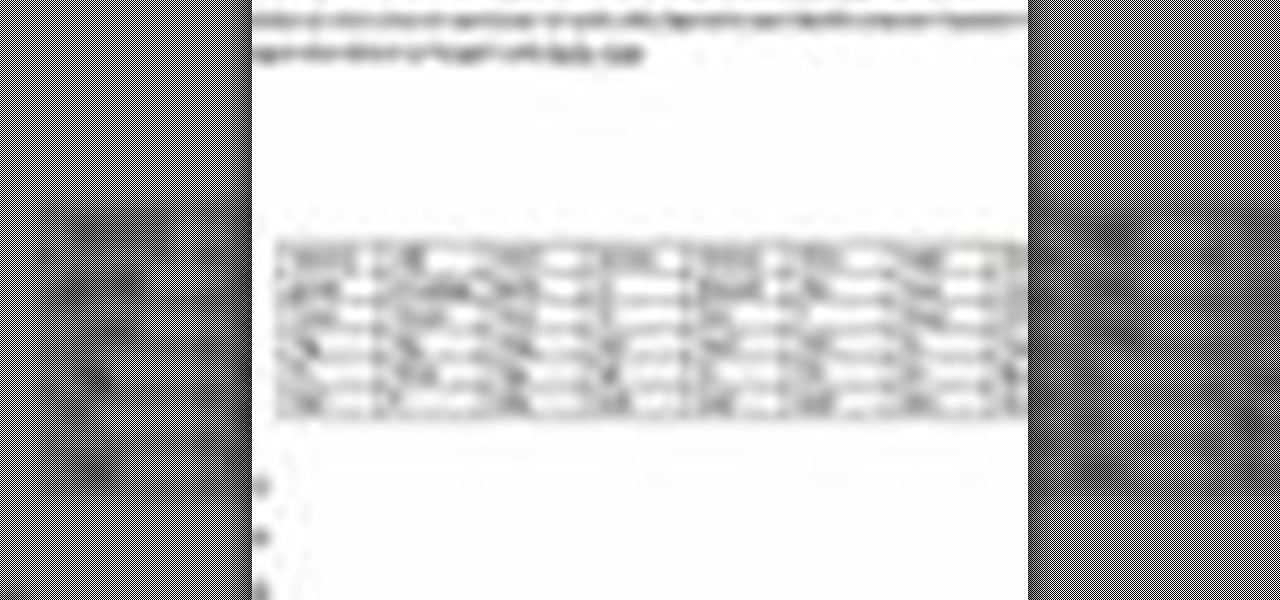
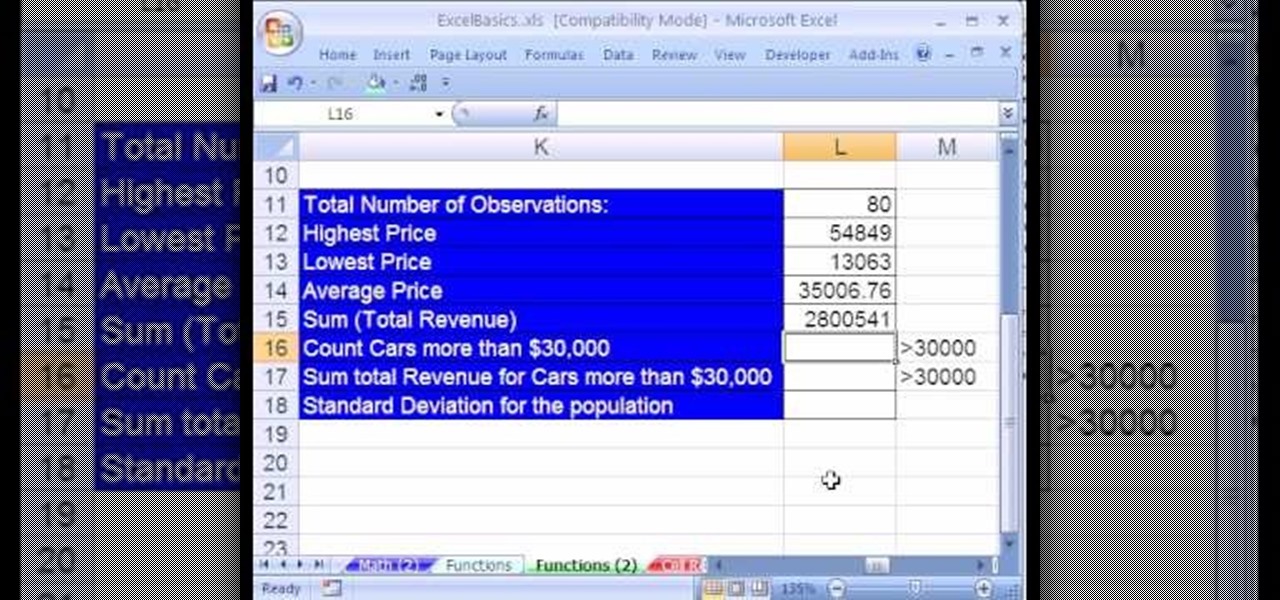
How To: Calculate variance and standard deviation using Excel
This video shows the method to find the variance and standard deviation using Excel. The variance shows the variability of the data points from the median. We find the difference of the median and the mean. We write the formula using '=' sign. The median and data points are put in it by selecting the appropriate cell. The median is made an absolute constant by pressing the F4 key. This is squared by using '^2'. This is multiplied to the frequency using '*'. The result is found for all the dat...

How To: Use general printing options in MS Word 2007
In this video the instructor shows how to user printer options in Microsoft Word 2007. To do this go to the Microsoft button and click it. Form the drop down menu select the print option. Now you are presented with the three options of Print, Quick Print and Print Preview. Print is used to directly send documents to the printer by selecting the necessary settings. Quick Print is used to quickly send the documents to the printer using the default settings. Print preview is a useful way of seei...
How To: Insert and edit text in MS Word 2007
A video from Helpvids.com that shows how to Insert and edit text in Microsoft Word 2007. There are many ways to do document editing tasks in any of today's advanced word processing programs and MS Word 2007 is no exception to it. There are many ways to do the same task in word (For Ex. from the menu, using mouse gestures, using shortcuts etc).

How To: Add title labels & set data labels in MS Word 2007
This video is from HelpVids and describes how to change the axis titles on charts in Microsoft Word 2007. To access the chart tools, select the chart and the tools will appear above the ribbon. There are many different design options that you can preview on the screen to make your final selection. To change the chart title, click on the Chart Title button which is located on the Layout ribbon. You can then select where you would like the title to appear. Once you select the location you can t...
How To: Open/copy/save files & create folders in MS Word 2007
When you're using MS Word you should be able to see a large Microsoft office icon in the top-left icon. Clicking it opens up a menu where you should be able to see the save button. Pressing this button will save your work or overwrite a previous copy. If you press 'save as' instead, you will have the option to change what format the file is saved as and what name it is saved under so as not to overwrite the existing copy. When you've decided on the name and format and where to save, just pres...
How To: Use navigation & selection techniques in MS Word 2007
User mel_bone teaches you how to use navigation and selection techniques in Microsoft Word 2007. You will notice in the bottom right corner of the main window a slider. This controls the zoom. You can thus increase the page size or decrease it, as you need. When you have a document that has more than one page, you can go to the end of the document by pressing ctrl+end. Ctrl+home brings you to the start of the document. Clicking and holding the mouse button pressed on the navigation bar lets y...

How To: Make a checklist form in MS Word 2007
This video will go over how to insert a check box in Microsoft Word for printing or for electronic distribution. With just a few clicks you can get a check box. You can even add different symbols or styles for your check box.

How To: Save files in MS Word 2007 as Word file types
This video tells you how to save files in Microsoft Word using different file types. If you are trying to save a file as the old Microsoft Word 97-03, the process is easy. This video takes you through a visual tutorial on how to save files under different documents. If you click the circle in the upper left corner and scroll down to save as, it will give you several different options to save under. Then, you can choose which document you want to save it under, and save the file under a new na...

How To: Use drag & drop in MS Word 2007
In this video the instructor shows how to use the drag-and-drop feature in Microsoft Word 2007. You can use drag-and-drop to copy and move information within the Word document. This is particularly useful when you want to move and copy information within one page. However, if you want to move information between different pages, use the normal copy-paste feature. If you want to move any information, first highlight and select the data. Now click and hold down the mouse button in the middle of...
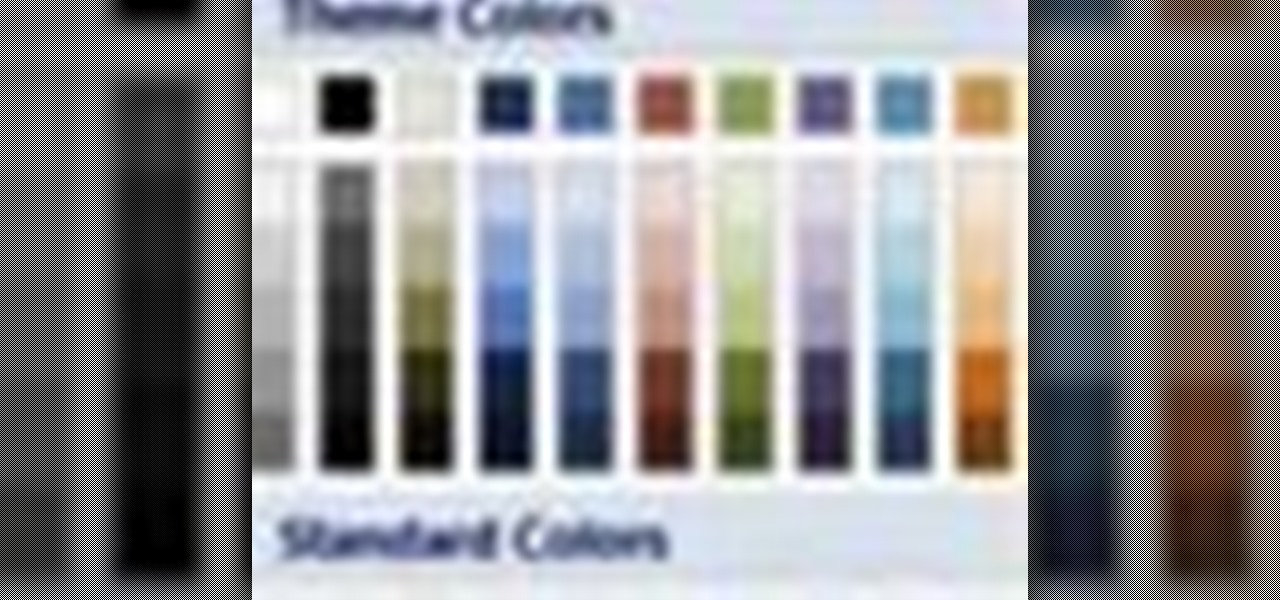
How To: Create a watermark or background in MS Word 2007
This video shows you how to change the background color and watermark in your Word 2007 document. Both settings are found on the Page Layout tab. The background color can be chosen from a wide palette. The most frequently used colors are immediately applied to the current page as a preview. You can also choose to add a fill effect, like a color gradient, by clicking the Fill Effects item in the Page Color list. The watermark feature allows you to add either a predefined notice, an image or a ...
How To: Open, close & save documents in MS Word 2007
In this beginners video, the instructor shows how to use Word 2007 by opening, closing, and saving documents. When you open the Microsoft Word software with out any documents, the window looks gray indicating the same. There is an office button present in the top left corner of the window through which you can access various options. Click on it, and select the open button which brings up the open dialog box. Now, you can browse through your computer and select any Word document to be opened....
How To: Insert a picture or clip art in MS Word 2007
For inserting a picture, from the INSERT Tab click picture. Then the insert dialog box gets opened. From there you can locate the desired picture. Locate the picture to be inserted and double click it. We can also replace the picture selected. For replacing any one of the following can be done: Under PICTURE tools, on the FORMAT tab, in the ADJUST group, click Change picture OR right click the picture to be replaced and click CHANGE PICTURE. Locate a new picture, and double click it.
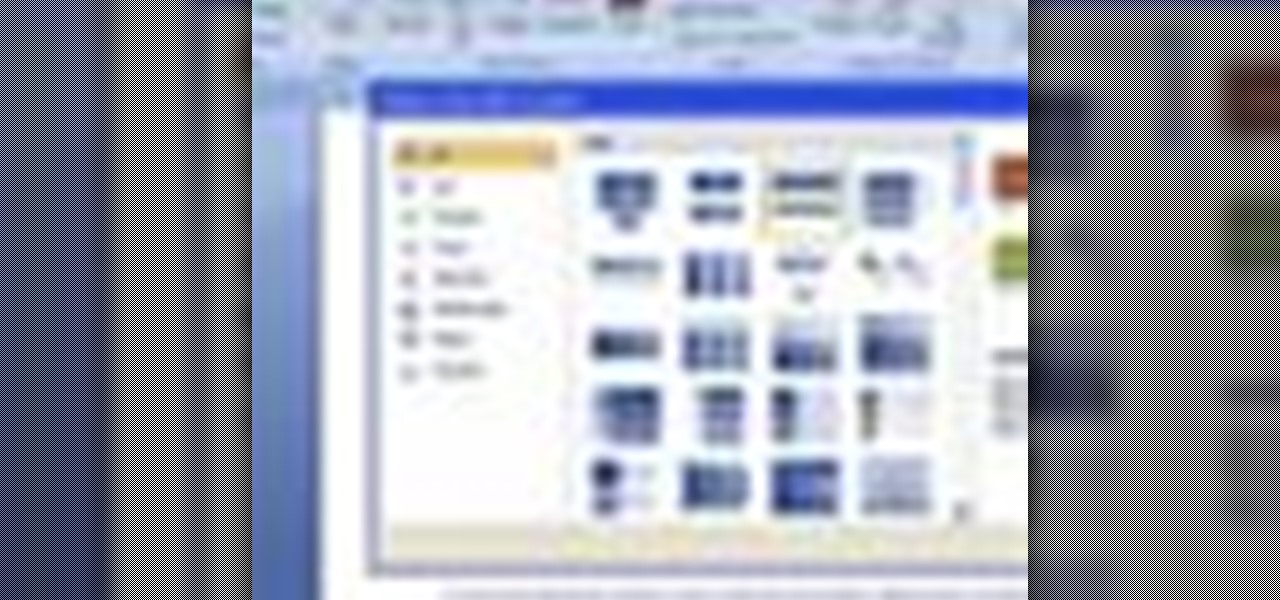
How To: Create a flow chart in MS Word 2007
This video will show you how to create a flow chart in MS Word 2007. First click on the Insert tab. You can see the smart art option, click on it. A "Smart Art Graphic" window will appear.

How To: Add drawings and free-form shapes in MS Word 2007
In this Microsoft Word tutorial the instructor shows how to add a drawing or a free form shape to a document. Using the canvas in the Microsoft Word 2007 can be very helpful in adding graphical content to your document. Adding shapes and special effects like shadows, 3D will give a rich look to the document. To do this open a document in Word 2007. In the tool bar go to the Insert tab and in that select the Shape button. Now you are presented with plenty of predefined auto shapes. First at th...
How To: Use Outlook Express in Windows XP
In this video, the instructor shows how to use Outlook Express in Windows XP. This software comes bundled with Microsoft Windows XP, which is a part of Microsoft Office package. Outlook is an e-mail client that allows you to view your e-mails on your computer without the help of any web interface to your mail host. To use Outlook Express, you need to configure it first. Open the Outlook Express program. Outlook will then take you through a wizard to help you to configure your email host. Ente...
How To: Insert and remove page numbers in MS Word 2007
This video will demonstrate the process to implement page numbers in your Microsoft Word 2007 documents. The video starts out by showing the Insert Tab on the Microsoft Word 2007 Ribbon. On the Insert Ribbon, you will see an icon titled Page Number. All of the Page Number options are available when you click the down arrow directly beside the icon. The are many different position options such top of page, bottom of page, page margins, or current position. The customization options are as endl...

How To: Create data in a chart to graph in MS Word 2007
In this video the instructor shows how to create charts and graphs in Microsoft Word. First, open the Word document and select an area to insert the charts. Now go to the Insert tab in the ribbon and select the Chart icon. The Insert Chart window opens up with various chart templates. There are various categories of charts like Line, Pie, Bar in the left hand side. In the right hand side you can see the sample charts available and you can select any of them that you want. Now it transfers you...
How To: Use Excel data analysis functions (max, min, average)
Create a table with sales data with this video.
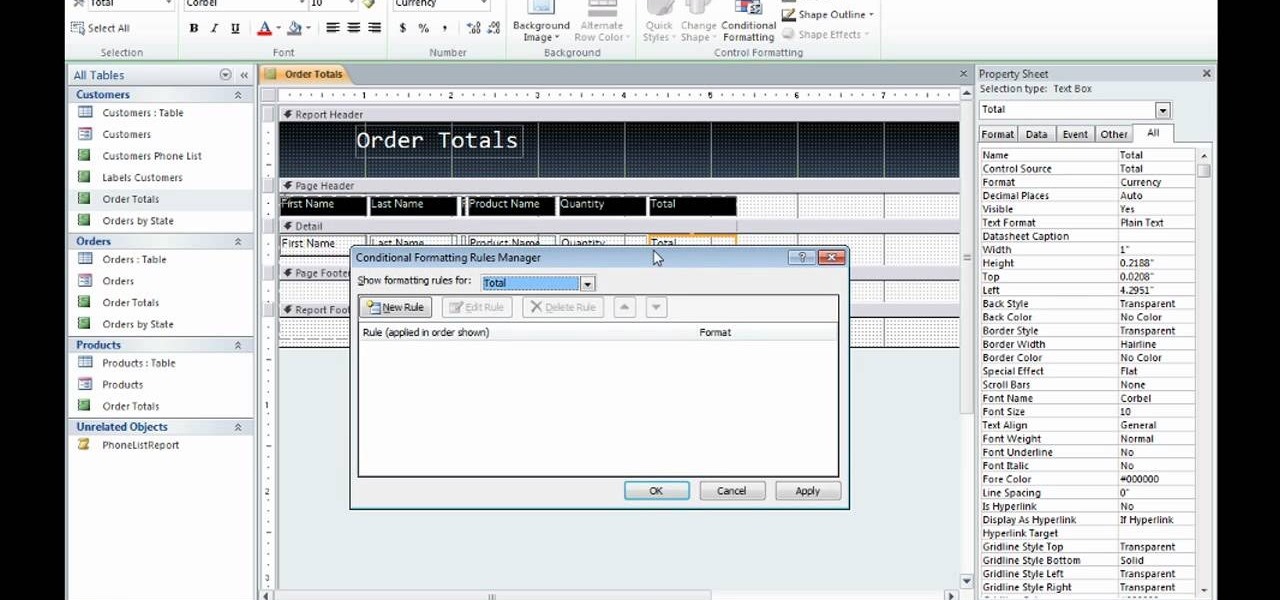
How To: Apply conditional formatting within MS Access 2010
lyndapodcast teaches you how to apply conditional formatting withing Microsoft Access 2010. You click View - Design View. Click the Total tab and you'll notice some highlighted options above. Click Format and then Conditional Formatting. This where you will create rules. Click the new rule button. Now you will see the conditions with drop-down menus. Type in the numbers you want and then select the formatting you want when the rule is true. The preview below will show you how the numbers will...
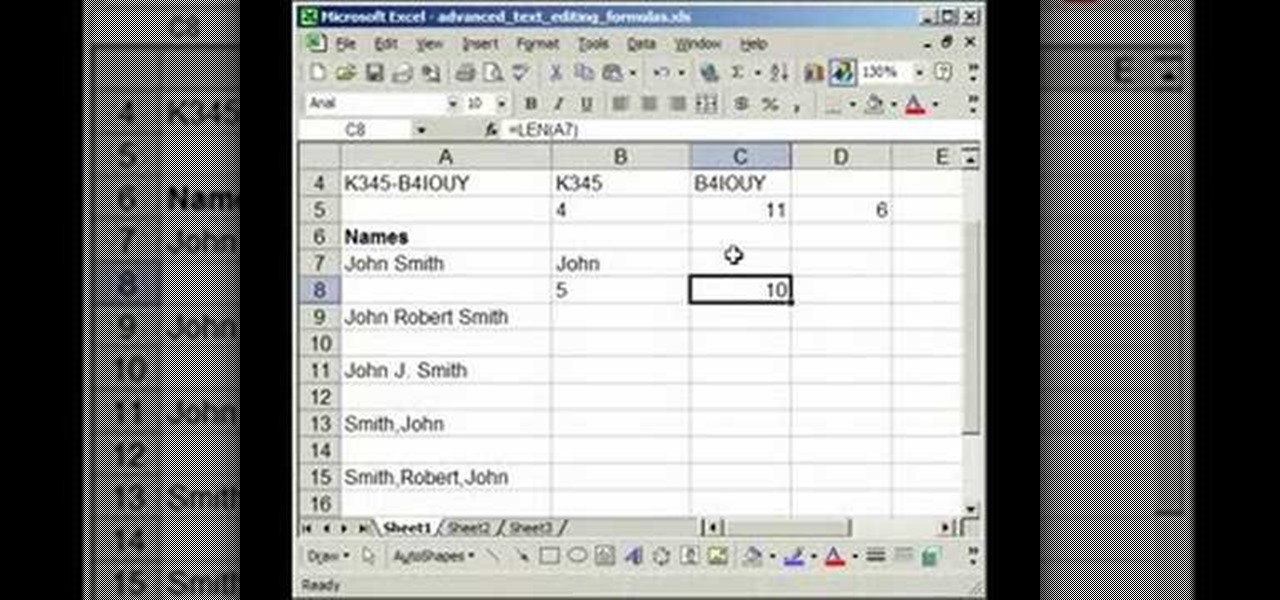
How To: Pull text from Excel cells & separate into columns
Mastering your Excel skills? Have a busy Excel workbook or spreadsheet that needs to some organizing? In this two-part tutorial, learn how to pull text from cells & separate them into multiple columns in MS Excel. You will learn how to use the LEN(), FIND(), LEFT(), and RIGHT() functions to pull text from Microsoft Excel 2007 cells & assign them to different columns.
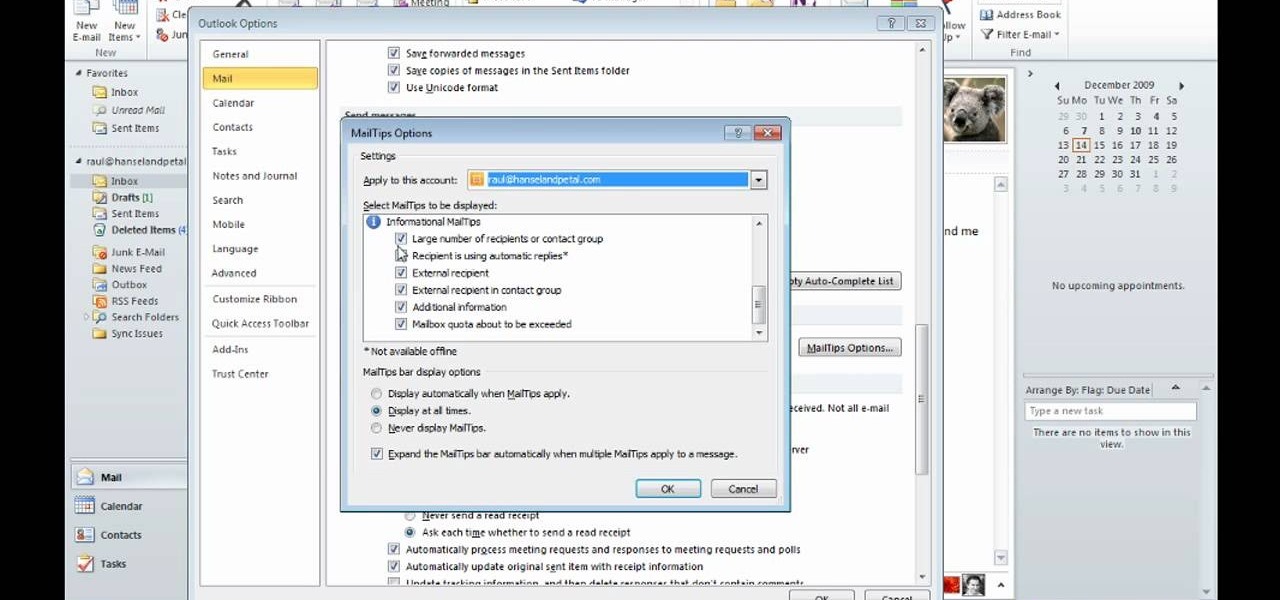
How To: Set email preferences with MailTips in MS Outlook 2010
David Rivers is back to give us some more tricks on using MS Outlook 2010. In this video he tells us how you can avoid sending email to the wrong person by setting up some email preferences in MailTips. MailTips actually has the ability to alert you when you are about to send an email under certain conditions. Don't worry about sending an email to your boss that was meant for your co-worker. Your MailTips folder contains many options that you can use to restrict some of your outgoing mail and...
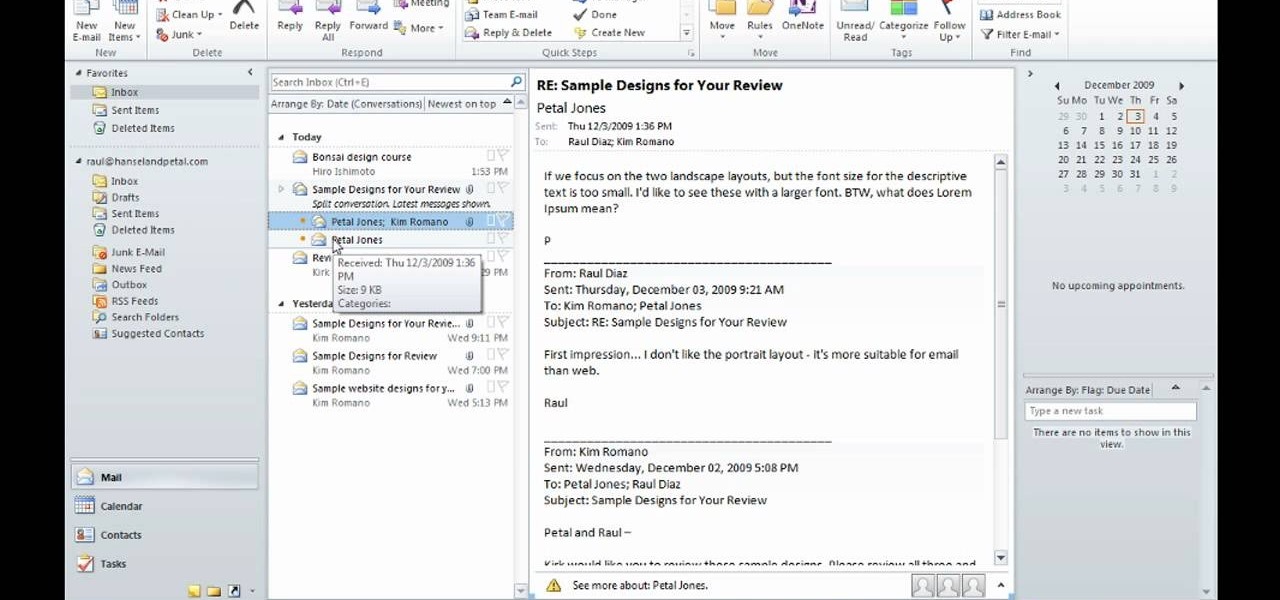
How To: Manage email with Conversation view in MS Outlook 2010
In this video David Rivers shows that the conversation look of Excel 2010 has greatly improved. Tracking and managing related emails, saves your inbox space to enable you to manage large number of emails effectively. By default, the conversations are arranged by date. Email interactions will have an arrow displayed. You can easily expand and collapse the conversation. The major improvement is the function of ignoring or clearing up conversation with just a few clicks. The future conversations...
How To: Fill in the blanks with custom number format in Excel
This video teaches how to fill in the blanks with custom number format in Excel. Open any similar worksheet as shown in the video or type the same to use. Select all the cells in the columns E and F and press F5. Now click 'Specials', then select 'Blanks' and click 'OK'. All the blank cell will be highlighted, now enter the value and press 'Ctrl+Enter' to populate all the blank cells. Press 'Ctrl+1' to format cells, select custom if you want something to show up in the cell but not really be ...
How To: Add continuous music to your PowerPoint presentation
This video helps us how to add continuous music to your PowerPoint presentation. To add continuous music to your PowerPoint presentation, click "Insert" in the Main toolbar. Place arrow key on the Sound icon and wait for options to appear. Select "Sound from File". Locate for and select the sound file. Select "Automatically" button once a window appears. Select "Animation" and then "Custom Animation". A window appears on the right side of the screen. Select "Effect" options and choose the num...
How To: Compress a video file using the VirtualDub application
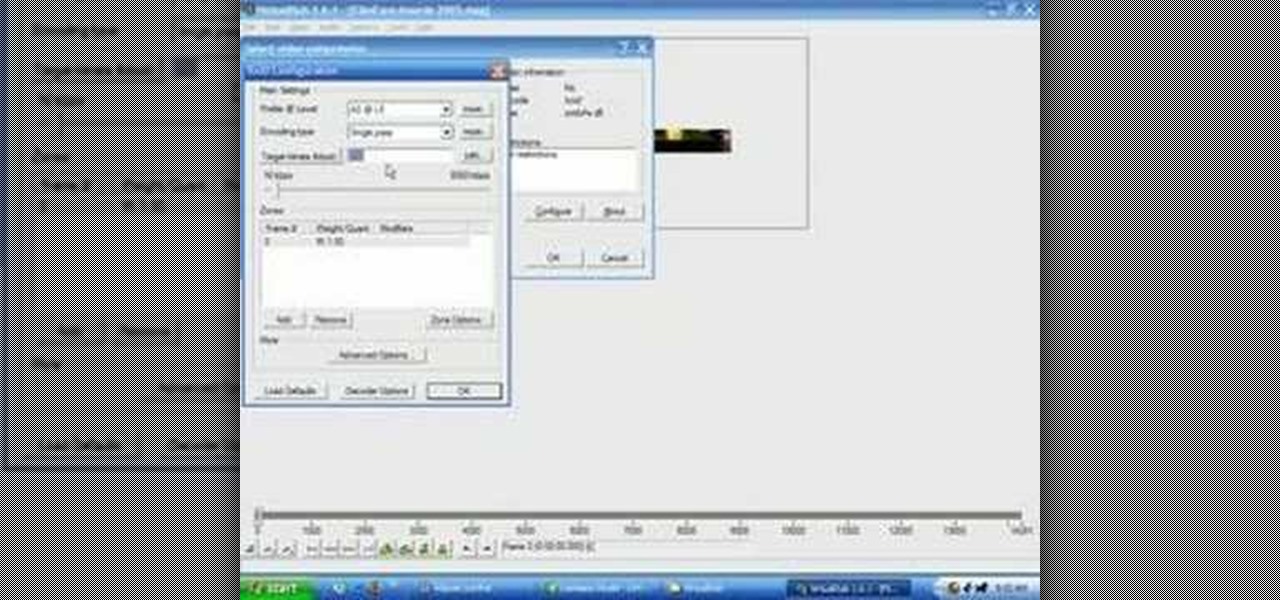
This quick video will show you how to compress a video file. To compress a video file you will need software called Virtual Dub. Open Virtual Dub and open a video file you want to compress. Click on Video Compression Choose the video codec named Xvid, and click on Configure. Select AS@L5 and Single Pass. Click on the target button, select 300kb. Go to Audio Compression. Select MPEG layer 320kb stereo sound. Save as an AVI. When it's finished the file will be on your desktop.
How To: Use the double space function in MS Word 07
Here you will learn how to use the double space function in MS Word 07. To use the double space function in MS Word, do the following: Open MS Word 07. After typing in some text, highlight the part which you want to double space. Click on the Icon that says "Line Spacing". Click on it and scroll down to find 2.0. Click on it. Now your work has been double spaced. A shortcut to do this would be to click Control and 2, and it will automatically double space everything for you.
How To: Create a dynamic weekly chart in Microsoft Excel
New to Excel? Looking for a tip? How about a tip so mind-blowingly advanced as to qualify as a magic trick? You're in luck.
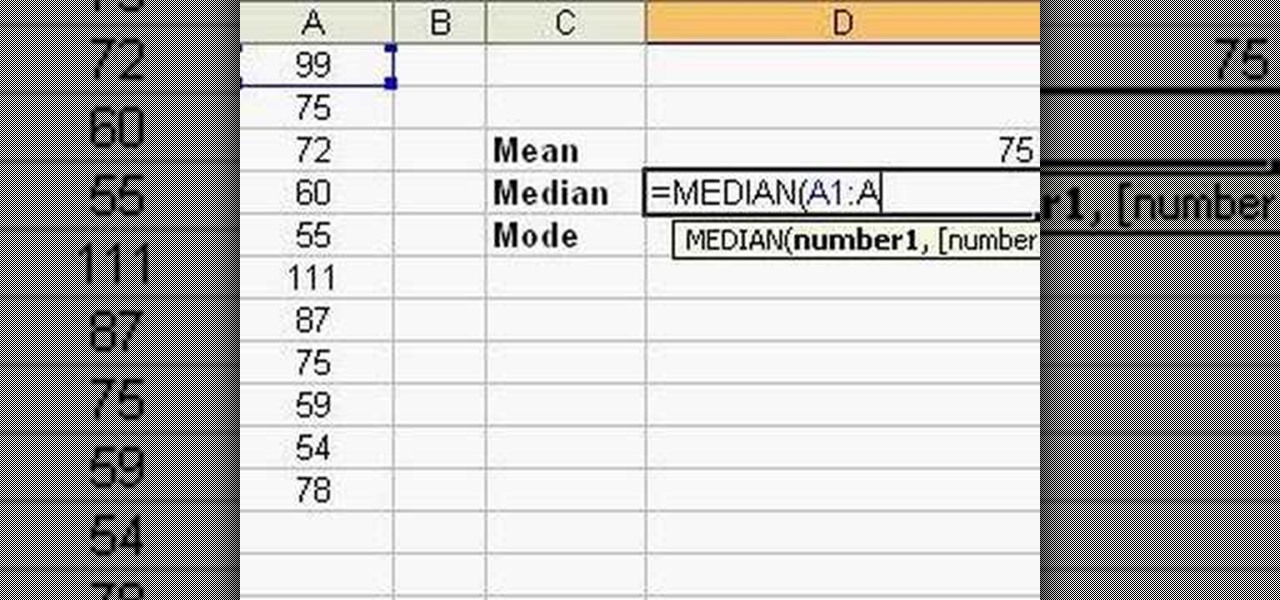
How To: Use Microsoft Excel to determine statistical values
Follow this video to learn how to formulate calculations in Microsoft Excel. First type in a list of numbers in the cells. In order to calculate the median click on the cell where you want the answer to be shown. Then type equals, average, open bracket and insert the cell code where the first number is, colon, and then type in the cell where the last number in the list lies, and close brackets. In practice this is an example where the numbers are in a list from cell A1 to cell A11: =AVEARAGE(...
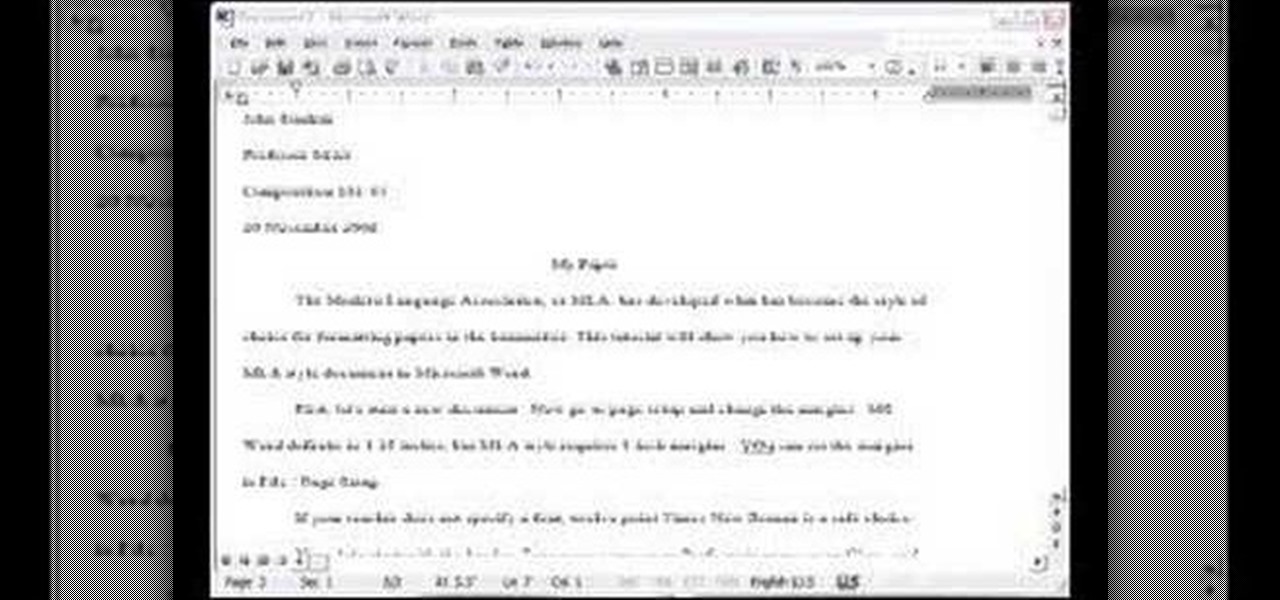
How To: Set up an MLA style essay in MS Word
This tutorial will show you how to set up your college essay using MLA style formatting in Microsoft Word. Follow these steps to set up MLA style formatting: Open a new document and change your margins to 1". Set your font to 12 point Times New Roman. Set the header by typing your name, your professor's name and your class and section. Add the date from the Insert Menu. Set your spacing to double. Enter your title in the center of the page. New paragraphs are indicated by indents, and not spa...
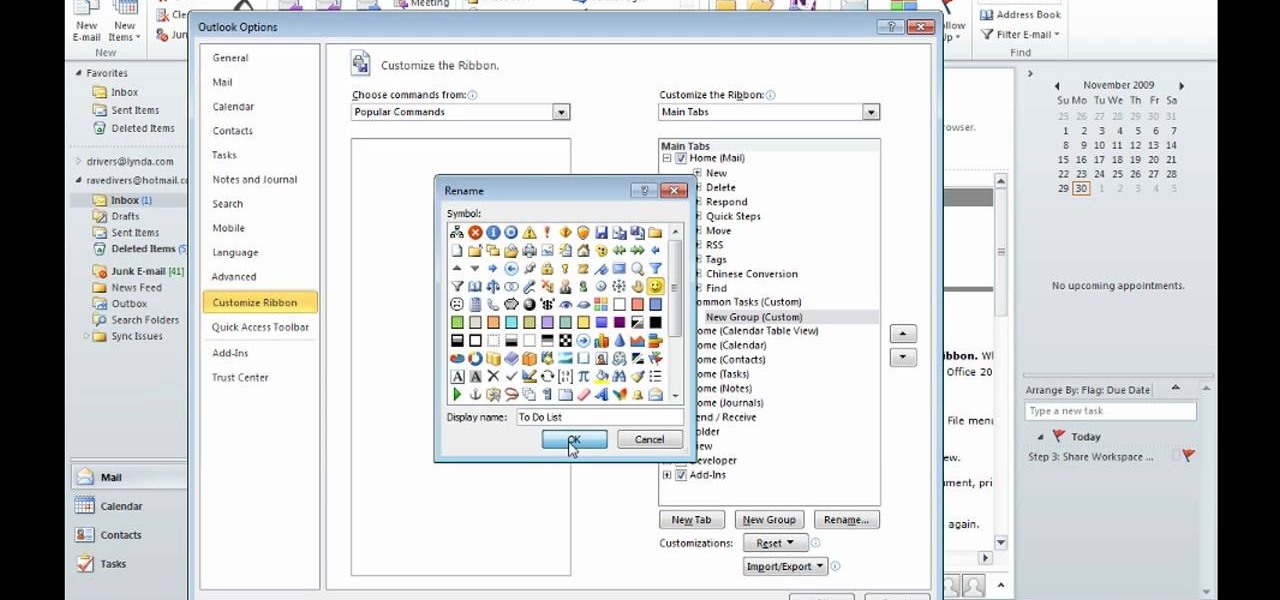
How To: Use the Ribbon and Backstage view in MS Outlook 2010
After you launch Outlook 2010 in your computer, you will see the Ribbon strip immediately in the main window. The button for writing a new e-mail is separated from a button for creating new items in the calendar, contact list or task manager. An independent Quick Steps section offers functions allowing you to move a message into different folders, to save it into a calendar as a meeting reminder, to quickly forward it to a chosen person or to more people and to forward it with a FYI note. If ...
How To: Use Excel percentage number format
This video tutorial will teach you how to format percentage numbers in MS Excel. Excel is a spreadsheet application that allows you to use calculations, graphs, pivot tables and much more to create the spreadsheet you want. You can learn how to avoid common mistakes that occur with formatting percentages and how to set the program to automatically format numbers as you type. This video will guide you through formatting percentages as you learn how to use MS Excel to make spreadsheets.
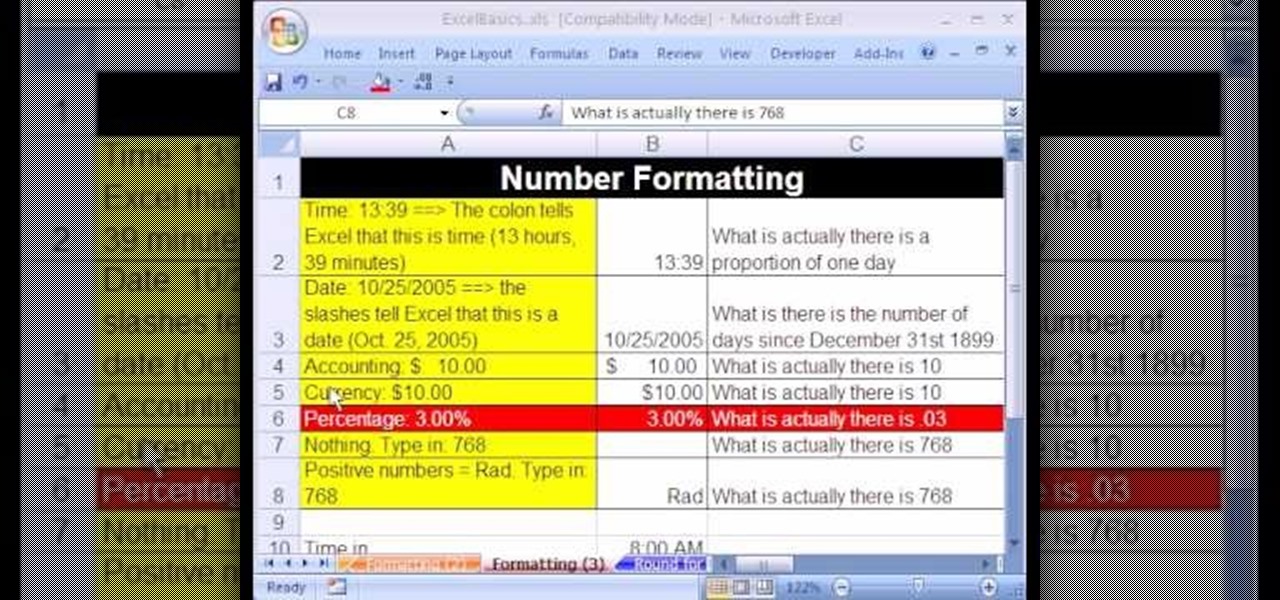
How To: Use Excel round function & number formatting
In this video the instructor shows how to use the Round function and also format numbers in Microsoft Excel. Normally while calculating formulas in Excel, the formatting of numbers can get you into a lot of trouble and to get around this problem you need to use the Round function. To do this take some sample data in a Excel work book and apply any formula that you want on the data to arrive at some calculation. Now because of this formatting some times you can arrive at a wrong result as show...
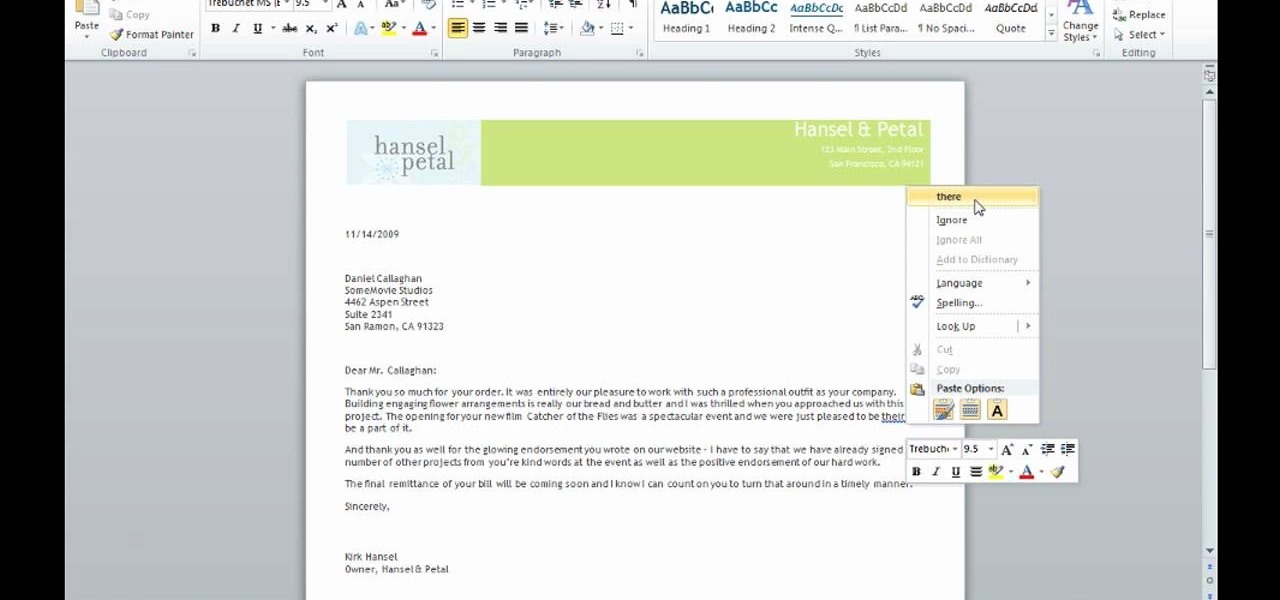
How To: Check spelling and grammar in MS Word 2010
This video tutorial is a quick explanation of the ins and outs of spell and grammar check when using MS Word 2010. One of the main things highlighted in this video is that unlike previous additions, this year's version offers more contextual correction. For example, when the word their was used in an article, it was spelled correctly but used in the wrong context. The spell and grammar checker will underline this to let you know that it is incorrect. If you hit the spell and grammar check but...
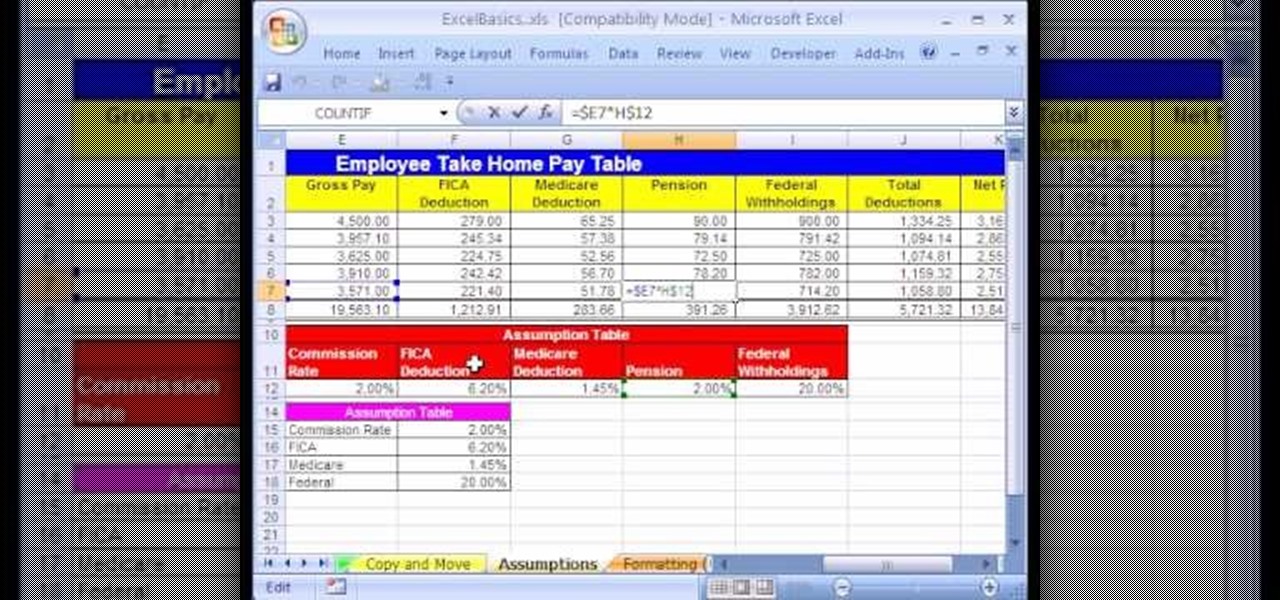
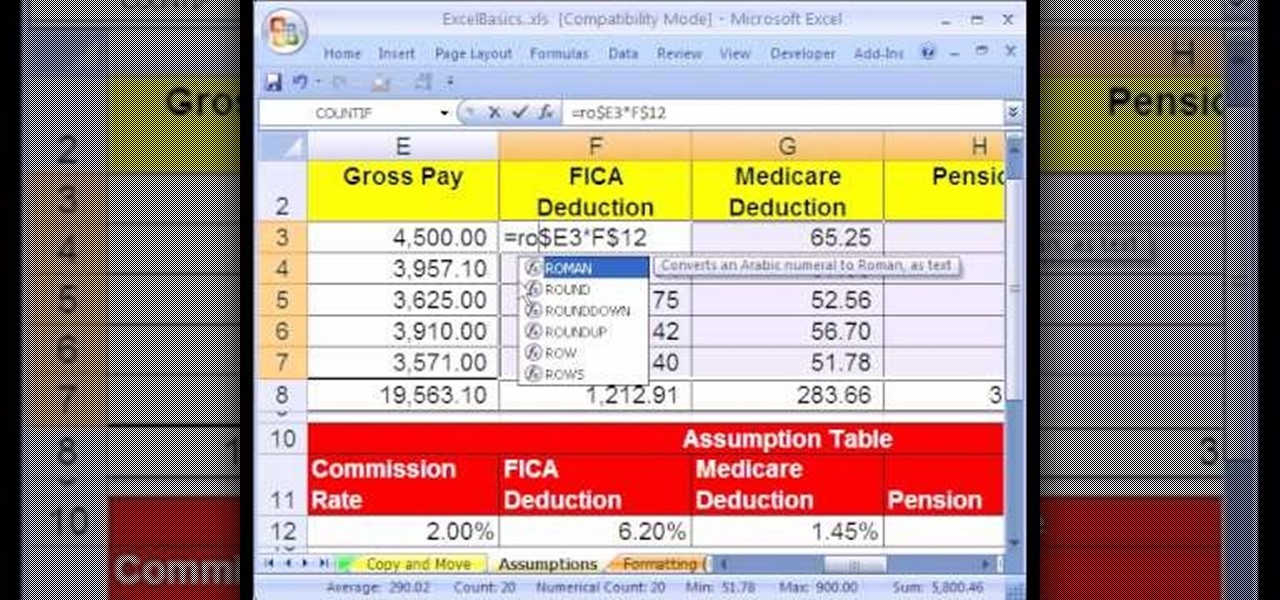
How To: Use Excel spreadsheet setup & cell references
In this Excel basic video the instructor shows how to setup a spreadsheet and use cell references. Cell references are used in Excel to refer to other cells in a formula. When a formula contains data based on the cell reference the formula auto generates the result each time the value in the cell changes as the formula contains only the reference to the cell and not the actual data present in it. In this video the tutor goes on and shows how to write a few basic formulas using cell references...

How To: Do 2 pivot tables w/ different date groupings in Excel
Want to get more from the raw data you're entering into your Excel worksheets? Now you can create two distinct pivot tables in Excel comparing, for example, monthly and quarterly sales data. Not familiar with the pivot table? Pivot tables summarize spreadsheet input by counting, sorting and totaling data within a list and providing at-a-glance computations within the same sheet. Become an expert on the subject within 5 minutes and 24 seconds by following easy to understand instructions narrat...
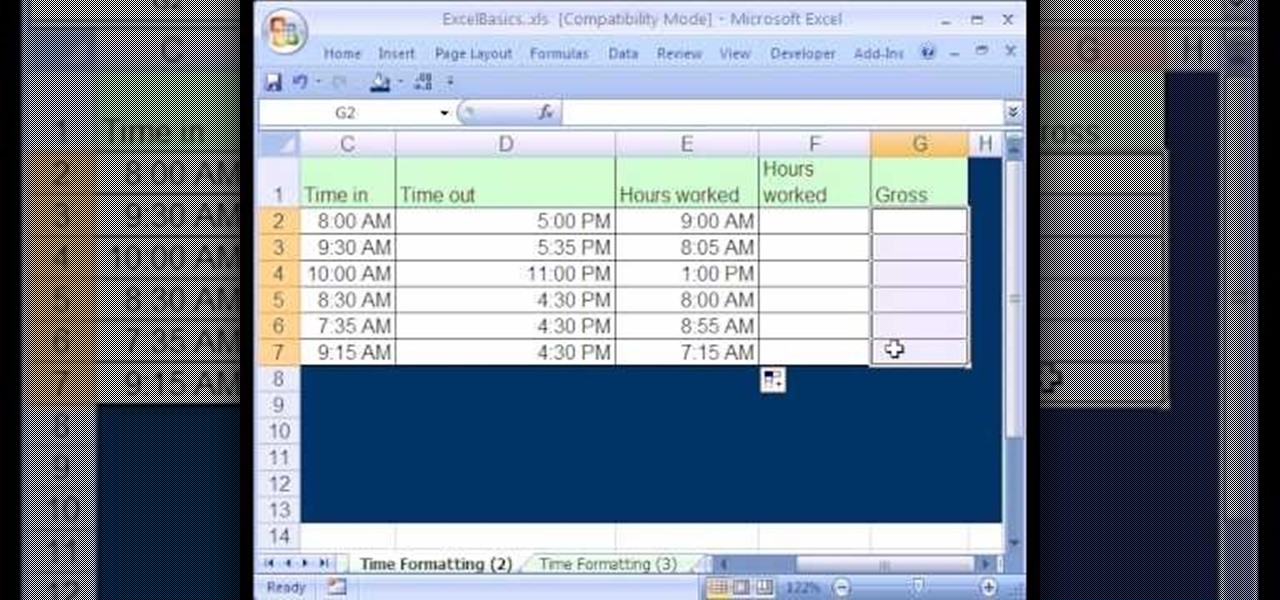
How To: Use Excel date math & time formatting
Once you learn some of the basics, Excel is an easy program to use. With the use of some simple formulas, you can streamline your whole data entry process. Just by typing in =SUM you can set a row or column to show the sum of other entries. It really is that easy. This video will show how to use these formulas and take advantage of Excel date math and time formatting.